Creating your Google Analytics Account
Google Analytics is available for free and all you need is a Google or Gmail account to sign up. The signup process is quite simple, follow the step-by-step instructions below to create your Google Analytics account.
Step 1: First you need to visit the Google Analytics website to sign up. When you’re on the website, simply click the ‘Get started today’ button.

Next, you will be asked to log in with your Google account. If you already have a Google or Gmail account, then you can use that to sign in. Otherwise, you can go ahead and create a Google account for yourself.

Step 2: Once you sign in with your Gmail account, you will be prompted to a welcome screen like the one below.
This is where you will signup for Google analytics with your Gmail account. Go ahead and click the ‘Start measuring’ button.

After that, you will be asked to provide an account name. This name will be used internally so you can use anything like your business name.
Google Analytics will also show multiple account data sharing settings. These settings give you control over sharing your Google Analytics data. You can keep the default settings and move on to the next step.

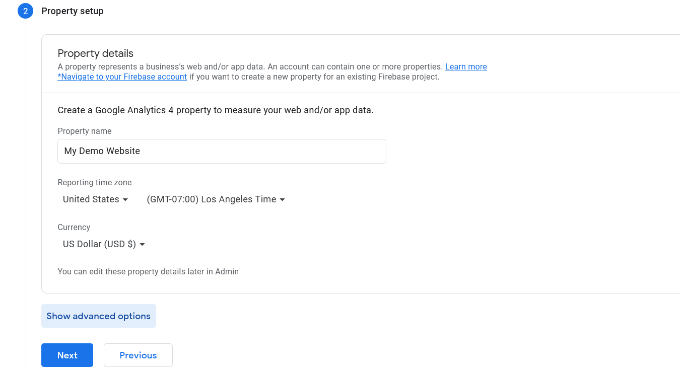
Step 3: On the next screen, you will need to create a Google Analytics property.
Google introduced a new version of Analytics called Google Analytics 4 or GA4. It’s the latest version that tracks your website and mobile apps in the same account. Plus, you get new features, metrics, and a different interface for your reports.
Important Note: If you already have a Universal Analytics account, then it’s critical to start tracking data in Google Analytics 4 (GA4) as well. That’s because Google will sunset Universal Analytics on July 1, 2023. After the sunset date, Universal Analytics will not receive any data and will eventually stop working.
Setting up a Google Analytics 4 property after the sunset date will mean starting from scratch. However, you can start sending data into GA4 today while still using Universal Analytics. This way, you’ll have historical data in Google Analytics 4 for comparison and analysis when Universal Analytics closes.
To start, go ahead and enter a property name, select your reporting time zone, and currency. Then click the ‘Next’ button.
On the next screen, you’ll need to select an ‘Industry category’ from the dropdown menu for your website and choose a ‘Business size’ from the given options.

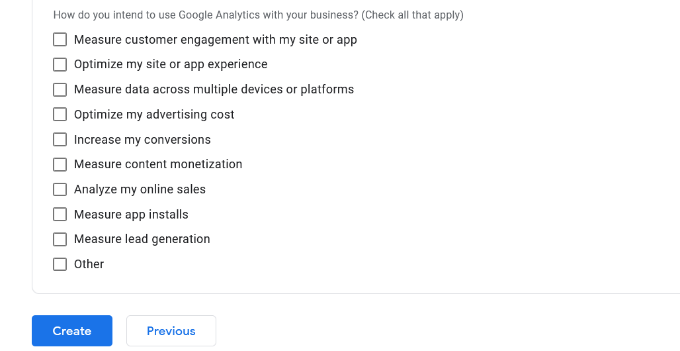
Next, you’ll need to scroll down and select how you intend to use Google Analytics with your business, like measure engagement, optimize advertising cost, increase conversions, and more.
You can choose multiple options or all of the given options that meet your needs. When you’re done, simply click the ‘Create’ button.
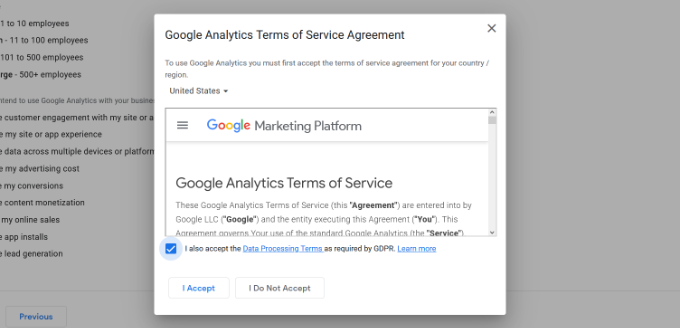
Once you click on the Create button, a popup window will open with Google Analytics terms of service agreement.
Simply click the checkbox for ‘I also accept the Data Processing Terms as required by GDPR’ and then click the ‘I Accept’ button.
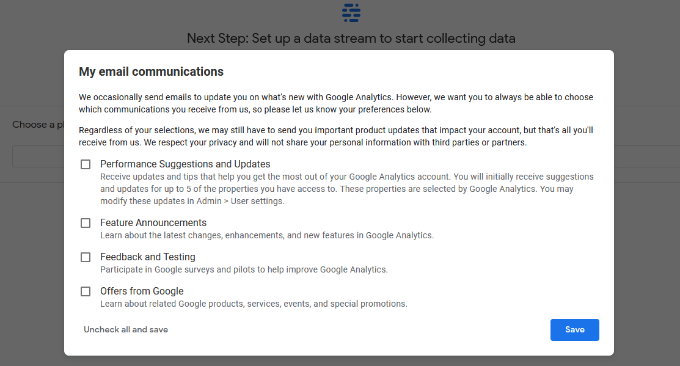
Next, you’ll see a popup with options on which communication emails you’d like to receive from Google Analytics.
Simply click the checkbox for the updates you want to receive and then click the ‘Save’ button.
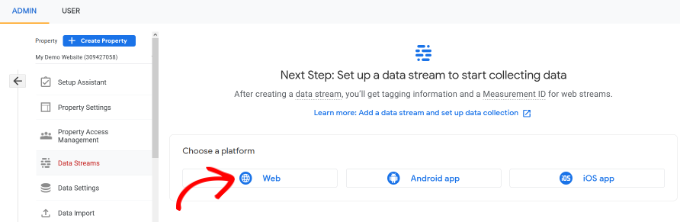
Step 4: Now you will be presented with your Google Analytics Webs stream options.
Since we’re setting up Google Analytics for a WordPress site, go ahead and select the ‘Web’ as the platform.
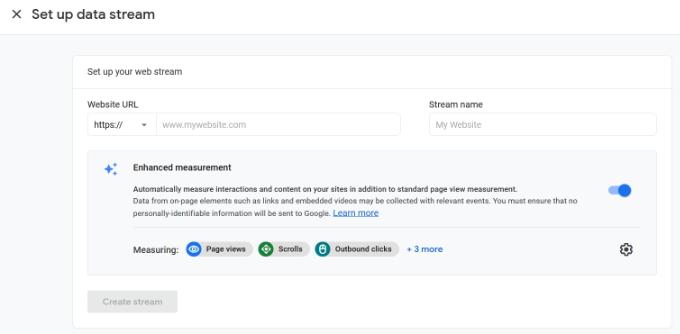
After that, you’ll need to enter your website URL and Stream name.
By default, Google Analytics will have an Enhanced measurement option enabled. This allows you to track page views, scrolls, outbound clicks, file downloads, and more in Google Analytics.
Next, you can click the ‘Create stream’ button.
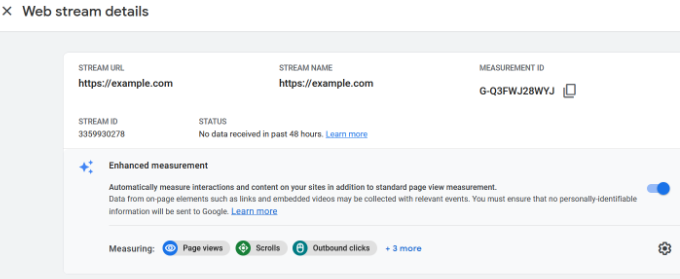
You can now see your Stream URL, name, and Measurement ID.
It will also show different enhanced measurements that it will record.
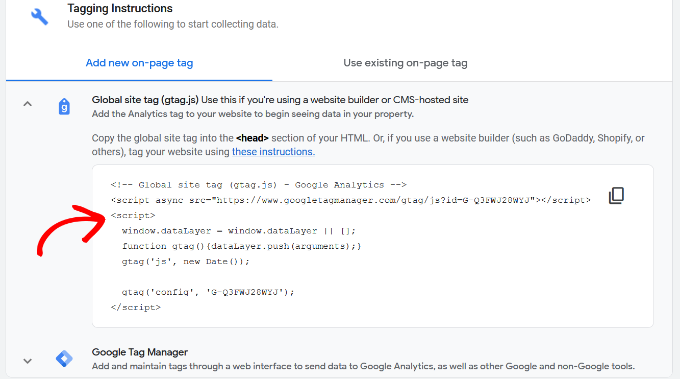
Google Analytics will also show different ways to add Google Analytics code to your WordPress website under the ‘Tagging Instructions’ section.
If you click the ‘Global site tag (gtag.js) option, you’ll see the Google Analytics tracking code.
While we recommend using the third-party plugin MonsterInsights, if you would prefer to manually connect Google Analytics to your ShareFaith website, you should copy this tracking code because you will need to enter it in your WordPress site. Using the steps below which include installing the MonsterInsights plugin, you would not need to copy this code at this time. You can also simply leave this browser tab open and switch back to copy the code when needed.
We suggest leaving the Analytics browser tab open as you may need to revisit it once you have installed the code on your WordPress site.
Now that you have set up a Google Analytics account, let’s take a look at how to install Google Analytics in WordPress.
Installing the MonsterInsights plugin
The first thing you need to do is install and activate the MonsterInsights plugin.
After you have logged into your website editor, select Plugins from the WordPress menu.

In the Search Bar, type Google Analytics and select the Install Now button for MonsterInsights plugin. After a few short moments, the Install Now button should now say Activate. Click this button again.

Upon activation, the plugin will add a new menu item labeled ‘Insights’ to your WordPress admin menu and you’ll see a welcome screen. Go ahead and click the ‘Launch the Wizard’ button.

Clicking on it will open the MonsterInsights setup wizard.
First, you will be asked to choose a category for your website (a business website, blog, or online store). Select one and then click on the ‘Save and Continue’ button.

Next, you need to connect MonsterInsights with your WordPress website.
Simply click on the ‘Connect MonsterInsights’ button.

This will take you to Google accounts where you will be asked to sign in or select a Google account if you are already signed in.
Go ahead and choose your Google account or enter your email to sign in.

Next, you will be asked to allow MonsterInsights to access your Google Analytics account.
Click on the ‘Allow’ button to continue.

The next step to completing the connection is to select the profile you want to track.
You need to select your website here and then click on the ‘Complete Connection’ button to continue.

After that, simply click on the ‘Complete Connection’ button to continue. MonsterInsights will now install Google Analytics on your website.
Next, you will be asked to select the recommended settings for your website.

The default settings would work for most websites.
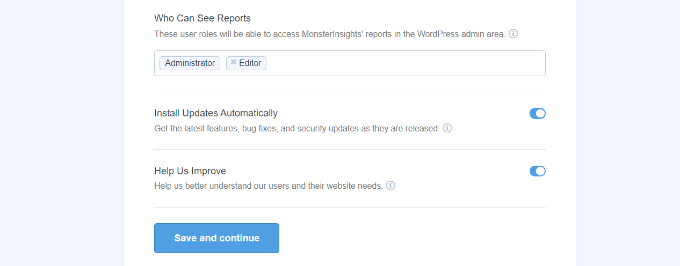
MonsterInsights will also ask who can see the reports. You can choose different WordPress user roles. Once you’re done, click on the ‘Save and Continue’ button to save your settings.
Next, MonsterInsights will show you a list of website tracking features you would like to enable.
You can scroll down and click on the ‘Continue’ button or the ‘Skip for Now’ option.
On the next screen, MonsterInsights will show that you’ve successfully setup Google Analytics tracking.
You can see that Google Analytics is connected, tracking code is installed, and data is now being collected.
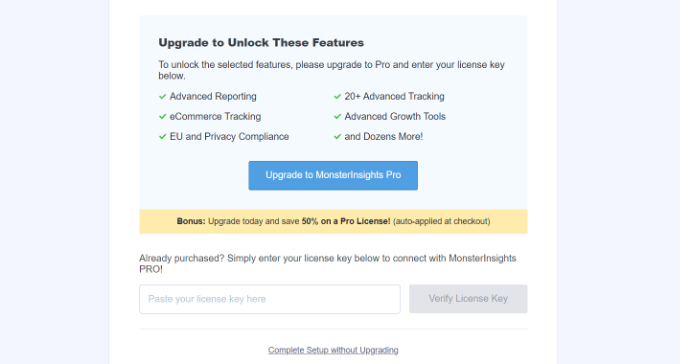
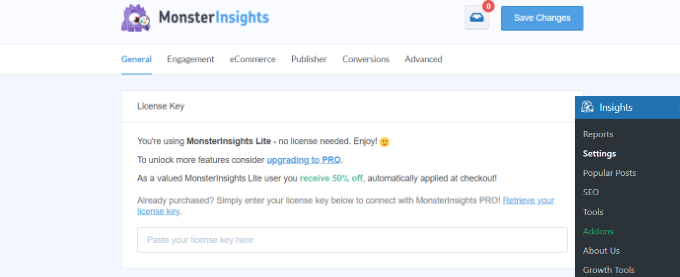
Next, you can scroll down and see a field to enter your license key.
Go ahead and click the ‘Complete Setup without Upgrading’ option for now.
You’ve successfully added Google Analytics to your WordPress website.
Next, you’ll need to create a Measure Protocol API Secret. This will allow MonsterInsights to track events like eCommerce purchases, form conversions, and more.
To start, you can login to your Google Analytics account. Then head over to the ‘Admin’ settings page and click on the ‘Data Streams’ option.
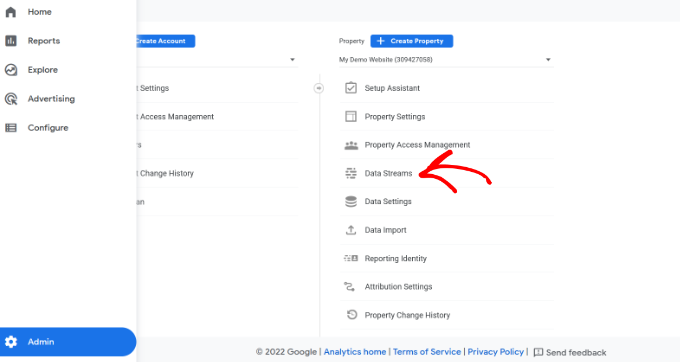
Next, you’ll see your Data Streams.
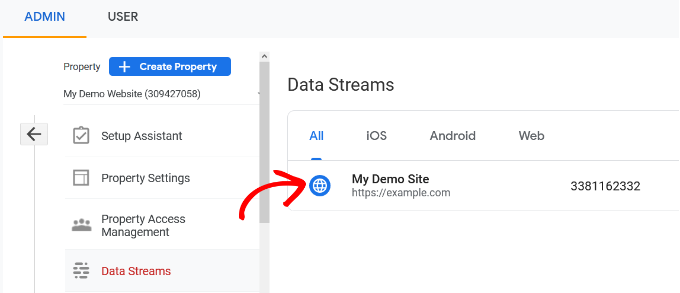
Simply select the data stream you connected with MonsterInsights.
On the next screen, scroll down to the ‘Advanced Settings’ section.
After that, click on the ‘Measure Protocol API Secrets’ option.
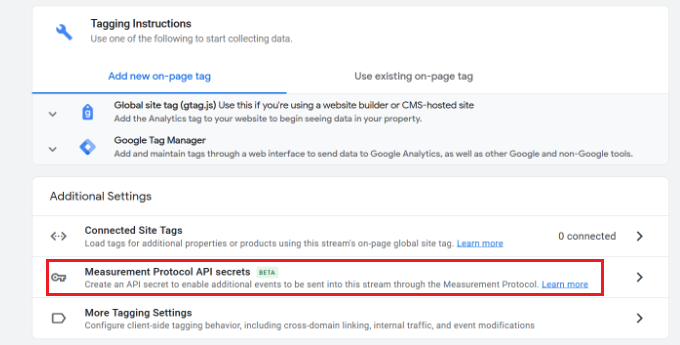
You’ll now see a new window slide in with your Measurement Protocol API Secrets. Initially, this page will be empty, and you won’t have any API secrets.
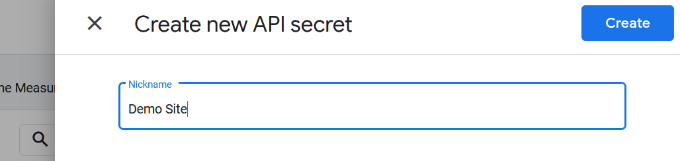
Go ahead and click the ‘Create’ button.

Next, you’ll need to enter a nickname for your API secret.
Once you’ve done that, simply click the ‘Create’ button.
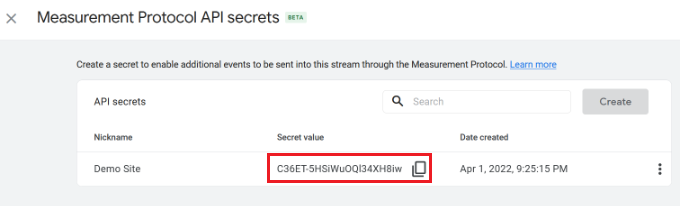
Your API secret will now be created.
Go ahead and copy the API secret that’s under the ‘Secret Value’ field.
Next, you’ll need to enter the Secret Value in MonsterInsights.
You can do that by going to Insights » Settings from your WordPress admin panel and then clicking the ‘General’ tab.
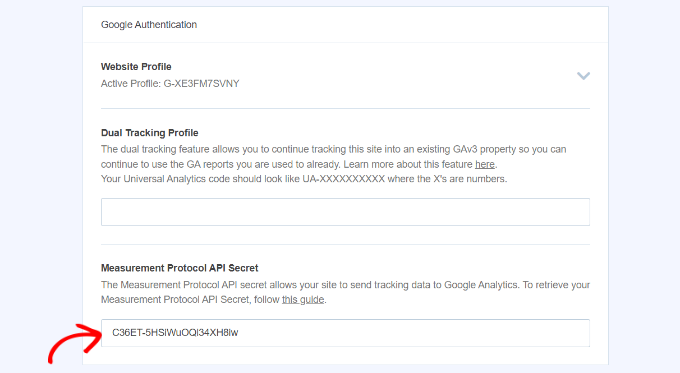
Then head over to the ‘Google Authentication’ section.
Simply enter the Secret Value under the ‘Measurement Protocol API Secret’ field.
You’ve successfully set up the Measurement Protocol API Secret and you are all set to begin using Google Analytics with your website!